Creating handmade holiday cards can be a simple and enjoyable way to add a personal touch to the season. A watercolor wreath design offers a charming option that works well for both beginners and those with more painting experience. The process is straightforward, making it easy to produce multiple cards without feeling overwhelmed.

This style of card combines festive colors with a clean, classic look that appeals to many tastes. With just a few basic supplies, anyone can create a design that feels warm and inviting, perfect for sending to friends and family during the holidays.
Quick & Easy Watercolor Christmas Wreath Card

Creating a handmade watercolor wreath card is simple with a few basic tools. The process works best with a small round paintbrush—sizes 4 or 6 give good control for fine details. A sturdy watercolor paper or pre-folded watercolor card will prevent warping when wet.
Essential Supplies
| Tool / Material | Notes |
|---|---|
| Round paintbrush (size 4 or 6) | Ideal for detail and curved strokes |
| Watercolor paper or card | Pre-folded or hand-cut |
| Watercolor paints | Brown, green, blue, and red |
| Metallic gold watercolor or gold pen | Optional for accents |
| Pencil | For light sketching of wreath shape |
Many artists prefer to cut and fold their own cards from full sheets of watercolor paper, though pre-made cards save time. A metallic gold accent—whether from paint or a pen—adds a refined touch without much extra work.
Suggested Color Choices:
- Brown for branches
- Sap green for leaves
- Light blue-gray for subtle shading
- Bright berry red for holly or berries
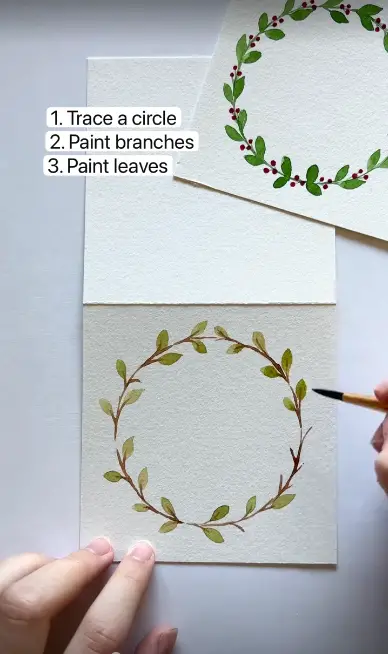
To start, lightly sketch a circle as the wreath guide. Use brown for the main branch structure, then layer green leaves around it. Add blue-gray to create depth. Finish with red berries for a festive look. If desired, apply gold highlights to certain areas for a warm shimmer.
For a step-by-step visual guide, follow this easy watercolor Christmas wreath tutorial to see the process in action.
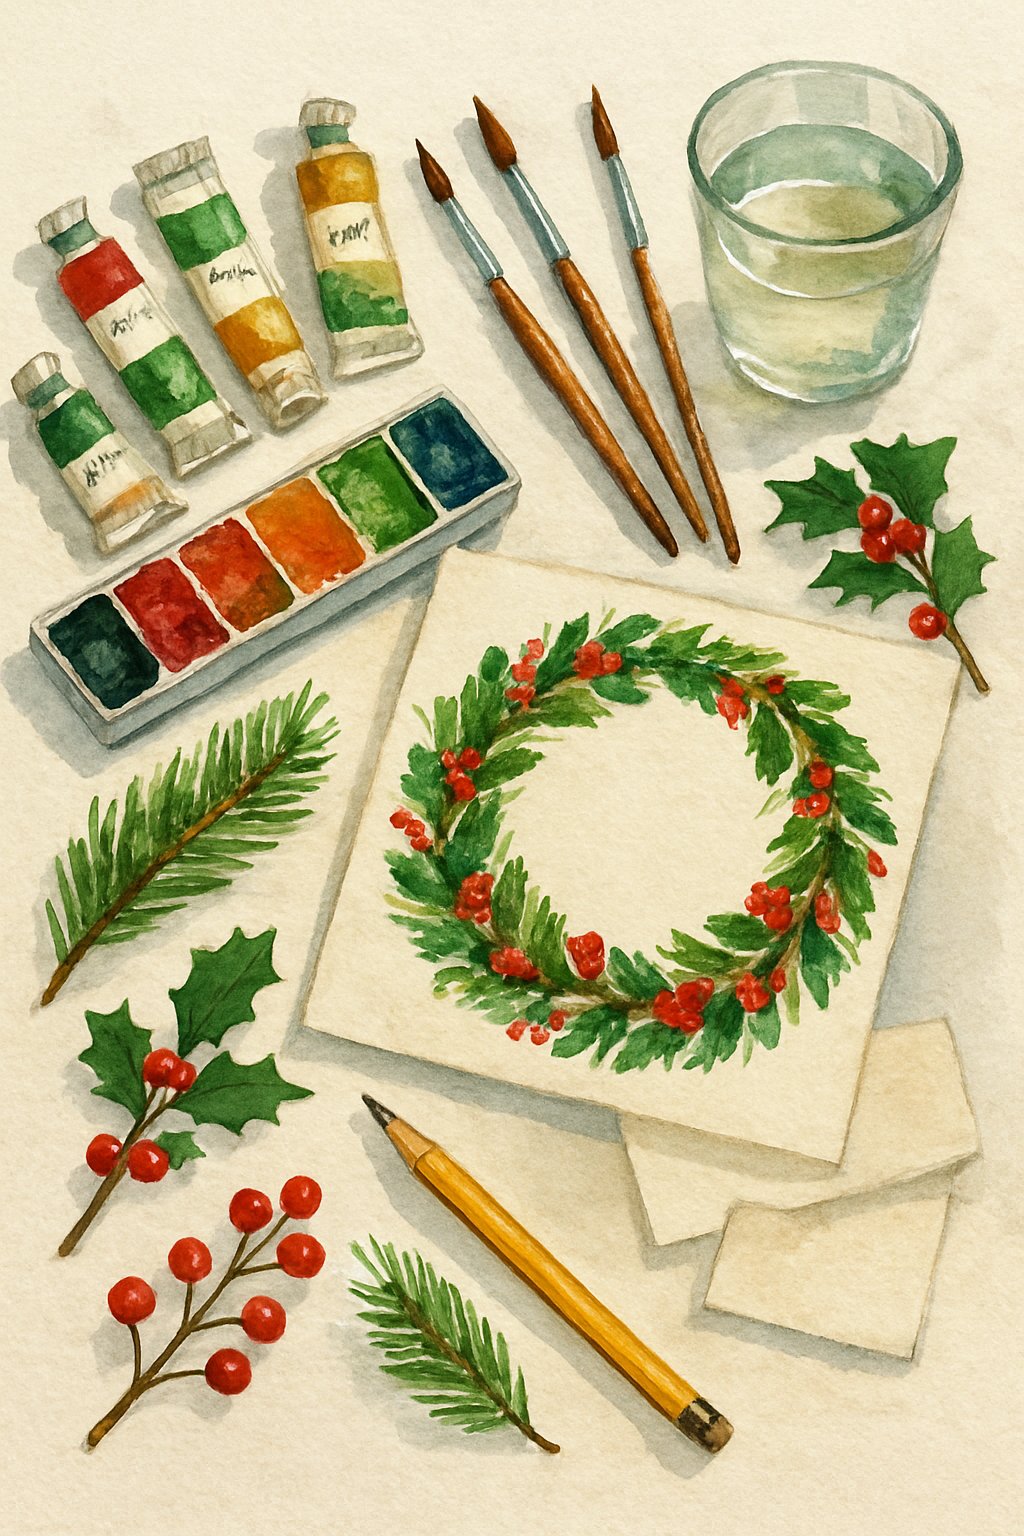
Supplies You Need To Create Watercolor Christmas Wreath Card

Creating a watercolor Christmas wreath card requires a few basic tools and materials. Using quality supplies will help the colors appear vibrant and the details stay crisp. Below is a clear list of what is needed.
Essential Tools and Materials:
- Round paintbrush – size 4 or 6 works well for fine details and small strokes.
- Watercolor paper – choose a sturdy sheet or use a pre-folded watercolor card.
- Watercolor paints – include brown, green, blue, and red.
- Metallic gold paint or pen – optional, but adds a festive touch.
- Pencil – for lightly sketching the wreath outline.
Optional but Recommended Choices:
- Pre-folded watercolor cards, such as those from Strathmore, for convenience.
- Cut and fold a sheet of watercolor paper for a custom card size.
| Item | Example Option | Purpose |
|---|---|---|
| Paintbrush | Princeton Heritage Round #4 | Precise strokes |
| Paper | Strathmore Watercolor Paper | Holds water and pigment well |
| Paints | Master’s Touch Tubes | Rich, blendable colors |
| Metallic Accent | “Gatsby Gold” handmade watercolor | Adds shimmer |
| Pencil | Standard HB | Light sketching |
For color mixing, it helps to have:
- Brown for branches.
- Sap green for leaves.
- Light blue-gray for soft background shading.
- Bright red for berries.
A metallic gold paint or a gold gel pen can highlight certain elements, giving the card a polished, festive finish. This small detail can make the design stand out without overpowering the rest of the artwork.
Steps to Create Watercolor Christmas Wreath Card

To begin, they should gather all needed tools and materials. A small round paintbrush in size 4 or 6 works well for precise strokes. The card base can be pre-folded watercolor paper or a piece cut and folded by hand.
Recommended Materials:
| Item | Notes |
|---|---|
| Round paintbrush | Size 4 or 6 for detailed painting |
| Watercolor paper or card | Heavyweight, textured paper |
| Watercolor paints | Brown, green, blue-gray, and red |
| Metallic gold paint or pen | Optional accent for details |
| Pencil | For light sketching |
Once the materials are ready, they can lightly sketch a circle in pencil to mark the wreath’s shape. This outline helps keep the composition balanced.
Next, paint thin brown strokes along the circle to form the base branches. Using a green shade, add small leaves along the branches, varying the angles for a natural look.
A diluted blue-gray can be brushed in lightly to add depth and cool tones. This step helps create contrast against the warm greens and browns.
Small red dots can be placed around the wreath to represent berries. For a festive touch, they may add metallic gold highlights using either watercolor paint or a gold pen.
It’s best to let each layer dry before adding new details to prevent colors from blending unintentionally. Once dry, the card can be left as is or personalized with a short holiday message in the center.
For more design ideas, they can explore beginner-friendly tutorials like this step-by-step watercolor Christmas wreath guide.
The supplies you’ll need
To create a watercolor holiday wreath card, it helps to have the right tools and materials ready before starting. The list below covers both essential and optional items so the process stays smooth and enjoyable.
| Item | Purpose | Notes |
|---|---|---|
| Round paintbrush (size 4 or 6) | For painting leaves, berries, and details | A smaller size offers more control |
| Watercolor paper or card | Surface for the artwork | Pre-folded cards save time; cut and fold your own for custom sizes |
| Watercolor paints | Main colors for the wreath | Brown, green, blue, and red are key |
| Metallic gold paint or gold pen | Adds decorative highlights | Optional, but creates a refined touch |
| Pencil | Light sketching before painting | Use a soft lead for easy erasing |
Tip: Pre-made watercolor cards, such as those from Strathmore, are convenient. However, cutting and folding a sheet of watercolor paper works just as well.
When selecting colors, choose:
- A brown for branches
- Sap green for leaves
- A light blue-gray (water-diluted) for accents
- Bright red for berries
Metallic gold can come from handmade paints, a gel pen, or a paint marker. It’s not essential, but it adds a subtle shimmer that stands out.
New to watercolor?
Those just starting can work with any basic watercolor set and paper. A simple round brush, a few core colors, and a sturdy surface are enough to practice techniques. Beginners may want to test brush pressure, water control, and color mixing on scrap paper before working on the final card. This helps build confidence and prevents mistakes on the finished piece.
Making a card with watercolor paper

To prepare a sturdy base, they first decide on the card’s dimensions. Square sizes like 5×5 inches or 4×4 inches work well for circular designs.
A larger sheet, such as 11×15 inches, can be trimmed down to create multiple cards. Common choices include 130 lb Strathmore or 140 lb Canson watercolor paper. Heavier paper than this can be difficult to fold neatly.
Steps to prepare the card:
- Measure the desired size with a ruler.
- Use a paper cutter for clean edges.
- Fold the piece in half with the textured side facing outward.
- Press the fold firmly with a bone folder for a crisp crease.
| Paper Weight | Brand Example | Notes |
|---|---|---|
| 130 lb | Strathmore | Smooth fold, good for cards |
| 140 lb | Canson | Slightly thicker, still easy to work with |
How to paint a watercolor Christmas wreath

Creating a watercolor Christmas wreath can be done with just a few basic shapes and simple brushwork. The design can be kept light and minimal or built up with more detail for a fuller look. Varying the color strength and direction of strokes helps the wreath appear more natural.
Materials needed:
| Item | Purpose |
|---|---|
| Pencil | Lightly sketch the base circle |
| Round object | Guide for tracing the circle |
| Small paintbrush | For fine lines and details |
| Watercolor paints (brown, green, red, blue-green, metallic gold) | Main colors for branches, leaves, berries, and accents |
| Water container | To rinse and dilute colors |
| Eraser | To remove pencil lines after drying |
Step-by-step process:
- Lightly trace a circle on the card front using a pencil and a round object as a guide.
- With a thin brush and brown paint, trace over the circle and add short branch lines extending from both sides of the main ring.
- Using green paint, add small leaves to the branches. Adjust the angle of each leaf so they don’t all face the same way.
- Mix a blue-green shade, dilute it with water, and paint small circles of different sizes to fill empty spaces between leaves.
- With red paint, dot small berries evenly around the wreath.
- Add metallic gold dots in any open spaces for a subtle shine. This can be done with gold watercolor or a gold pen.
Tips for a better result:
- To make leaves, outline the shape with the brush tip, then fill in the center.
- Adjust the water-to-paint ratio to create lighter or darker tones.
- Let the paint dry fully before erasing any visible pencil marks.
- For a personal touch, add a gold initial or short word in the center of the wreath.
By combining simple lines, dots, and shapes, the wreath gains a balanced and festive look. This method works well for cards, gift tags, or framed holiday art. For a beginner-friendly example, see this step-by-step watercolor Christmas wreath tutorial.
Frequently Asked Questions

What supplies are needed for making a watercolor holiday wreath card?
To make a watercolor wreath card, most beginners use:
- Watercolor paper (140 lb or heavier)
- Watercolor paints in greens, reds, and accent colors
- Round brushes in small and medium sizes
- Pencil for light sketching
- Eraser to remove guidelines
- Clean water and a paint palette
- Blank card base or folded watercolor paper
How should someone begin painting a festive watercolor wreath?
Start by lightly sketching a circle as a guide for the wreath shape. Use a round object like a cup to trace if needed. Begin with light, loose strokes to mark where leaves, berries, or branches will go. Keep the design simple at first to avoid overcrowding.
What beginner-friendly methods work well for painting watercolor wreaths?
Beginners often find success with:
- Layering light to dark colors for depth
- Using the wet-on-dry technique for crisp edges
- Adding small details last once the base layers have dried
- Practicing leaf and berry shapes separately before painting the full wreath
Is there a simple step-by-step process for creating a watercolor holiday wreath card?
A basic process could be:
- Sketch a circle guide in pencil.
- Paint the main greenery in light tones.
- Add darker leaves or pine needles for contrast.
- Paint berries, bows, or ornaments.
- Let the painting dry completely.
- Erase any visible pencil marks.
- Attach or fold into a card format.
For a beginner-friendly walkthrough, see this step-by-step watercolor Christmas wreath tutorial.
How can someone make their handmade wreath card more personal?
They can:
- Choose a unique color palette
- Add initials, dates, or short messages inside the wreath
- Use metallic watercolor paints for accents
- Incorporate seasonal flowers or plants that hold personal meaning
Are free patterns or guides offered for watercolor wreath cards?
Yes. Some websites offer printable templates and patterns to help with layout and design. For example, there is a free wreath pattern for beginners that can be printed and traced onto watercolor paper. These can save time and help beginners focus on painting rather than drawing the base shape.