Have you ever wanted to paint a cute watercolor fox but felt too intimidated to start? You are not alone. The good news is that painting a watercolor fox is much easier than it looks — and this step-by-step guide is designed specifically for complete beginners.
By the end of this tutorial, you will have a beautiful, finished watercolor fox painting you will actually be proud of. No experience needed. Just grab your supplies and let’s get started.
Why Paint a Fox in Watercolor?
Foxes are one of the most popular subjects in watercolor art — and for good reason. Their warm orange and rust tones are perfect for watercolor because the colors blend naturally and beautifully. The simple shape of a fox also makes it a great subject for beginners who are still learning brush control and layering.
Whether you want to frame it, use it as a card, or just practice a new hobby, this fox painting project is the perfect starting point.
What You Will Need (Supplies List)

Before we start painting, let’s gather everything you need. You do not need expensive supplies to get a great result — beginner-friendly options work perfectly here.
Watercolor Paints
You need a set that includes Burnt Sienna, orange tones, black, and white. A solid beginner set covers all of these with colors to spare.
👉 SEE THIS PRODUCT: MeiLiang 36-Color Watercolor Set This is one of the most highly rated beginner watercolor sets available. It uses high-purity pigments with natural gum Arabic, so the colors are vibrant and blend smoothly — exactly what you need for a fox’s warm fur tones. It comes in a sturdy metal case with a built-in palette, which makes it incredibly convenient.
Fox colors you will use from this set:
- Burnt Sienna or Rust Orange — main body
- Cadmium Orange or Deep Yellow-Orange — body highlights
- Titanium White or Chinese White — chest, tail tip, inner ears
- Ivory Black or Payne’s Gray — eyes, nose, paw tips, ear tips
- Raw Umber or Burnt Umber — shading
Brushes
You need two brushes at minimum: a medium round brush (size 6 or 8) for filling large areas, and a small detail brush (size 1 or 2) for the face and fine lines. A flat brush is optional for background washes.
👉 SEE THIS PRODUCT: Winsor & Newton Cotman 7-Piece Brush Set This set from one of the most trusted names in watercolor gives you every brush shape you need for this painting — round brushes in sizes 1 and 6, a rigger for thin detail lines, and more. The synthetic fibers hold their point beautifully and give excellent control, which matters a lot when you are painting tiny fox eyes.
Watercolor Paper
This is the most important supply of all, and where most beginners go wrong. Regular printer paper will buckle, tear, and ruin your painting. Always use proper watercolor paper, at least 140 lb (300 gsm), cold press texture.
👉 SEE THIS PRODUCT: Arches Cold Press Watercolor Pad 9×12″ Arches is the gold standard of watercolor paper, trusted by professional artists for centuries. It is made from 100% cotton fiber with a gelatin sizing that prevents paint from bleeding uncontrollably, lets you blend beautifully, and holds up when wet without warping. If you only splurge on one supply, make it the paper — it makes a bigger difference than anything else.
Other Supplies You Will Need
- A pencil and eraser for sketching
- Two jars of water (one for rinsing, one clean for mixing)
- A palette or ceramic plate for mixing colors
- Paper towel or cloth for blotting excess water
Beginner Tip: If budget is tight, you truly only need Burnt Sienna, black, and white to paint this fox. You can mix most of the shades you need from just those three colors.
Step 1: Sketch Your Fox Outline

Start with a light pencil sketch directly on your watercolor paper. Press gently — you want lines easy to erase after painting.
Here is a simple way to draw a beginner-friendly fox:
- Draw a medium oval for the head
- Add two large pointed triangles on top for the ears
- Sketch a wider oval below for the body, slightly larger than the head
- Draw a big, fluffy curved tail wrapping around to one side
- Add four short legs at the bottom
- Sketch a small triangular snout pushing outward from the face
- Mark two small circles for the eyes and a tiny triangle for the nose
Keep it simple and loose. This is a beginner painting, not a scientific illustration. Cute and approachable is the goal.
Tip: You can find free printable fox outlines online and trace them onto your watercolor paper using a light box or a sunny window. This is completely fine for beginners and gives you a reliable starting shape.
Step 2: Prepare Your Colors

Before touching your painting, mix and test your colors on a scrap piece of paper. This simple habit saves you from making color mistakes directly on your good paper.
Here are the key mixes for this fox:
| Color Name | How to Mix It | Used For |
|---|---|---|
| Fox Orange | Burnt Sienna + touch of Cadmium Orange | Main body |
| Light Cream | White + tiny drop of orange | Chest, inner ears, snout patch |
| Dark Rust | Burnt Sienna + Burnt Umber | Shading, deeper areas |
| Deep Black | Ivory Black straight | Eyes, nose, paw tips, ear tips |
Mix your watercolors with water until they are the consistency of thin juice — not too thick, not too watery. Watercolor should always flow smoothly off the brush.
Step 3: Paint the Base Coat

This is where your fox comes to life for the first time.
- Wet your medium round brush and load it generously with your Fox Orange mix
- Fill in the fox’s head, ears, back, and tail with loose, flowing strokes
- Work quickly — watercolor dries fast, and you want to blend while it is still wet
- Leave the chest area, inner ears, and snout area unpainted for now
- Do not worry about perfect edges at this stage — watercolor is meant to have natural softness
Beginner Tip: In watercolor, always work from light to dark. Start with lighter colors and add darker shades on top once dry. Never go in the other direction.
Let this base coat dry completely before moving on. This takes about five to ten minutes.
Step 4: Add the White and Cream Areas
Once your orange base coat is fully dry, take your light cream color and fill in:
- The chest and belly area
- The tips of the inner ears
- A soft patch around the muzzle and snout
- The tail tip — foxes have a white-tipped tail, and this is one of the most charming details
Use clean water and your medium brush to keep these sections light and clean.
Pro Tip: For a soft, blended edge between the orange and cream, paint the cream color while the orange is still slightly damp. The colors will naturally drift into each other, creating a beautiful soft transition. This is called the wet-on-wet technique and it is one of watercolor’s most magical qualities.
Step 5: Add Shading and Depth
This step transforms your fox from flat to three-dimensional. Using your Dark Rust mix:
- Add a shadow underneath the chin where it meets the chest
- Darken the inner area of the ears slightly
- Add a few strokes along the back and around the base of the tail
- Shade the underside of the body lightly
- Add shadow to the legs on the far side from the imagined light source
Use a very light touch. You can always add more depth, but you cannot remove it once dry.
Step 6: Paint the Face Details

This is the most rewarding step — giving your fox its personality and expression.
Eyes:
- Use your small detail brush loaded with black
- Paint two small almond shapes or round circles for the eyes
- Leave a tiny white dot unpainted inside each eye — this sparkle makes the fox look alive and expressive
- Add a thin outline around each eye for a more defined look if you like
Nose:
- Paint a small rounded triangle in black just above the mouth area
- Add two small curved lines below for the mouth
Ear Tips and Inner Details:
- Paint the very tips of both ears in black or deep dark brown
- Add a thin dark triangle shape inside each ear
Face Markings (Optional): Some artists add small dark streaks running downward from the inner corners of the eyes. This is optional but adds a lovely, realistic fox quality to the face.
Step 7: Paint the Legs and Paws
Foxes have distinctive dark lower legs and paws — this small detail is what makes the painting look authentic.
- Using black or very dark brown, paint the lower half of all four legs
- The dark color should start about halfway down and deepen toward the paws
- Blend the transition upward with a damp brush while still wet for a soft fade
- Add a few short lines on the paws to suggest individual toes
Step 8: Final Details and Touch-Ups

Step back from your painting and take a good look. Ask yourself:
- Are the eyes balanced and symmetrical?
- Does the tail look fluffy? Use your detail brush to add thin strokes along the outer edges suggesting fur
- Is the chest area bright and clean against the orange body?
- Is there a clear sense of light and shadow across the body?
Pen and Wash (Optional but Beautiful): One popular technique beloved by watercolor illustrators is adding fine liner pen work over a dry watercolor painting. Once your fox is completely dry, you can use a waterproof fine liner to add delicate fur lines, sharpen edges, or add whiskers. This style — known as pen and wash — is enormously popular on Pinterest and gives your painting an illustrated storybook quality.
Common Beginner Mistakes to Avoid
Using too much water: If your paint is too diluted, colors will spread uncontrollably and lose their shape. Test your consistency on scrap paper first.
Painting over wet layers: Always wait for each layer to fully dry before adding another. Painting over wet paint creates muddy, blotchy patches that cannot be fixed.
Using regular paper: This is the single most common beginner mistake. Regular paper buckles, bleeds, and tears under watercolor. Always use proper watercolor paper — and the Arches pad mentioned above truly makes a difference you will feel immediately.
Overworking the paint: Watercolor looks its best when given freedom to flow. Scrubbing or pushing the paint around too much destroys its natural luminosity. Trust the paint.
Making the pencil sketch too dark: Lines that are too heavy show through the watercolor. Always sketch very lightly.
Fox Color Palette Quick Reference
| Color | Mix | Area |
|---|---|---|
| Warm Orange | Burnt Sienna + Cadmium Orange | Main body |
| Soft Cream | White + tiny Orange | Chest, tail tip, inner ears |
| Deep Rust | Burnt Sienna + Umber | Shading, depth |
| Black | Pure Ivory Black | Legs, nose, eyes, ear tips |
Tips for a Pinterest-Worthy Fox Painting
If you plan to share your finished painting on Pinterest — and you absolutely should — here are a few tips to make it look its best:
- Paint on bright white watercolor paper, which photographs much more cleanly
- Take photos near a window in natural daylight, never with harsh indoor lighting
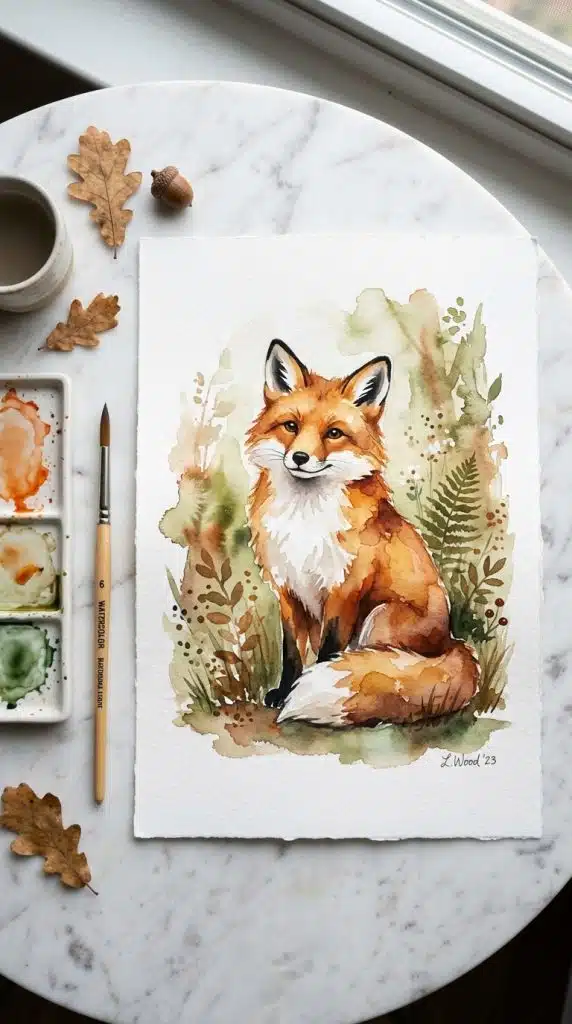
- Place the painting on a neutral surface such as white wood or marble
- Lay your brushes and palette beside the painting for a beautiful flat lay composition
- Shoot in portrait orientation (tall, not wide) — this format performs significantly better on Pinterest
Final Thoughts
Painting a watercolor fox for the first time is one of those projects that feels daunting but surprises you with how well it turns out. The key is to stay patient, trust the process, and work in layers.
Remember — watercolor is meant to have imperfections. Those little bleeds and soft edges are what make watercolor uniquely beautiful and impossible to replicate digitally. Your fox does not need to be perfect to be wonderful.
Now pick up your brushes and paint your fox. Once you finish one, you will want to paint a whole woodland scene.