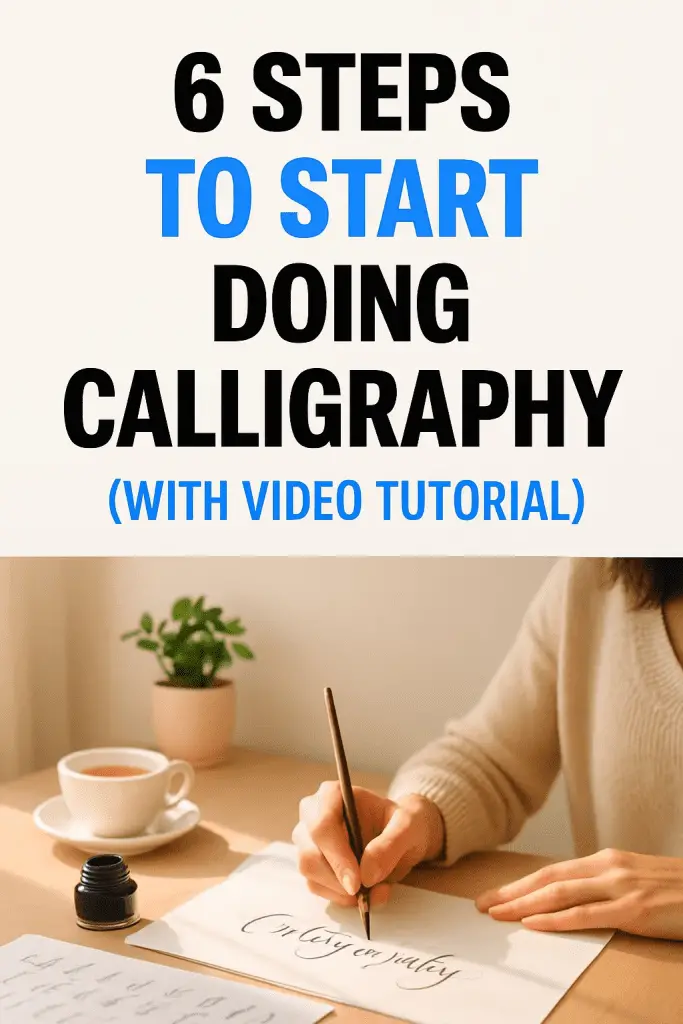
Calligraphy is a skill that anyone can learn with the right guidance and tools. To get started, a beginner needs a few basic supplies like a brush pen or pointed pen, quality paper, and ink. The process breaks down into six clear steps that help learners build steady strokes, understand letter forms, and practice consistently.

This approach ensures progress without feeling overwhelming. The included video tutorial offers a visual guide to make each step easy to follow. It is designed so that even those who have never tried calligraphy can quickly gain confidence and see improvement.
Essential Supplies and Tools for Beginners

Starting calligraphy requires a few key tools that help create smooth, controlled strokes. Choosing the right brush pen, suitable paper, and useful practice materials makes learning easier and more enjoyable.
Selecting the Right Brush Pen
A brush pen is the most important tool for modern calligraphy. Beginners often start with Tombow Fudenosuke brush pens because they have a firm, flexible tip that allows control over thick and thin lines. These pens are affordable and available in soft and hard tip versions.
When picking a brush pen, look for one that offers good ink flow without bleeding. Pens with a nylon or felt tip provide smooth strokes and last longer. Avoid cheap markers with stiff tips, as they can make it hard to learn proper pressure techniques.
Choosing the Best Paper and Practice Sheets
Paper choice significantly affects calligraphy results. Beginners should use marker paper or smooth, bleed-proof paper designed for ink work. This type of paper prevents ink from feathering or soaking through.
Using calligraphy practice sheets with guidelines helps maintain consistent letter size and spacing. These sheets often have grid lines or slanted guides that support muscle memory and improve hand control. Regular practice on the right paper speeds up progress.
Printable Resources and Digital Tools
Printable practice sheets are widely available online and help learners stay on track. Downloadable worksheets provide structured exercises and traces for different letter styles.
Digital tools like Procreate brushes offer an alternative for those who want to practice calligraphy on tablets. These brushes simulate brush pen effects and make it easy to erase and try new strokes without wasting paper. Digital practice suits those with access to a stylus and drawing app.
Step-by-Step Guide: How to Start Doing Calligraphy

Calligraphy practice begins with mastering simple movements before moving to letters and words. It involves learning basic strokes, practicing lowercase letters, connecting those letters smoothly, and finally working on uppercase alphabets for more style and variety. Each phase builds essential skills for brush lettering and overall calligraphy.
Understanding Basic Calligraphy Strokes
Starting with basic strokes is key to developing calligraphy skills. These strokes include thin upstrokes, thick downstrokes, loops, and curves. Practicing these shapes helps control pressure and movement, which are essential for brush lettering.
A common exercise is drawing straight thin lines by applying light pressure, then thick downstrokes with firm pressure. Repeating these strokes builds muscle memory, vital for consistent letter creation. Focusing on smooth transitions between strokes will improve the flow and appearance of letters.
Using lined practice sheets or grid templates can guide stroke size and spacing. This step forms the foundation for creating balanced and clean calligraphy letters.
Practicing Lowercase Letters
Once basic strokes feel natural, moving on to lowercase letters is the next step. Lowercase letters are simpler and frequent in writing, so mastering them helps improve overall calligraphy skills.
Each letter combines multiple strokes from the practice phase. A good approach is to break letters into segments, practicing each part slowly before joining them. For example, the letter “a” uses a basic oval with a downstroke.
Practicing consistently, using worksheets or videos, will help improve letter shape and control. The goal is to create uniform, legible letters, focusing on stroke placement and pressure changes.
Connecting Letters to Form Words
After individual letters are mastered, connecting them smoothly creates words. This step is important for brush lettering style, which relies on fluid, joined letters.
Practice linking letters first with simple combinations like “to,” “at,” or “it.” Pay close attention to how strokes flow from one letter to the next without breaking or uneven spacing.
Consistency in angle and spacing gives words a cohesive look. It’s helpful to slow down and focus on transitions until smooth connections become automatic. Practicing common letter pairs can improve skill quickly.
Learning Uppercase Alphabets
Uppercase letters add variety and emphasis to calligraphy work. They often have more complex shapes and decorative elements compared to lowercase letters.
Learning uppercase alphabets involves studying their structure and practicing with attention to proportion. Many uppercase letters combine thick and thin strokes with additional flourishes or loops.
Beginning with simple forms of uppercase letters is best before adding extra decoration. Using guided tutorials or reference sheets can assist in learning these letters properly.
Incorporating uppercase letters into practice will expand calligraphy skills and allow for more expressive brush lettering.
Exploring Different Calligraphy Styles

There are several ways to practice calligraphy, each with unique tools and techniques. Some styles use brush pens, while others rely on traditional nibs or simple pens. Understanding the differences helps beginners choose the right path.
Modern Brush Calligraphy
Modern brush calligraphy uses flexible brush pens or paintbrushes to create thick and thin lines by varying pressure. Light pressure makes thin lines, and heavy pressure creates thick strokes. This style is popular for its fluid, casual look.
Beginners often start with basic strokes and simple alphabets before moving on to words. Brush pens come in many colors and sizes, making them easy to use at home or on the go. Practice focuses on controlling the pen pressure and smooth transitions between strokes.
Traditional and Faux Calligraphy Techniques
Traditional calligraphy uses dip pens with metal nibs dipped in ink. It requires precision and steady hand control. This style can include scripts like Blackletter and Italic, which follow strict rules about letter shapes and spacing.
Faux calligraphy mimics these effects using regular pens or markers. Instead of varying pressure, the artist draws thin lines first, then adds thickness by filling in parts of the letters. This technique is easier to learn and affordable since no special tools are needed.
Both traditional and faux calligraphy help build strong lettering skills. They focus on letterforms, angles, and consistent spacing to create balanced designs.
Tips for Developing and Refining Your Calligraphy Skills

Building strong calligraphy skills requires focused practice and awareness of common challenges. Consistent, well-structured routines help improve muscle control and letter shapes. Avoiding errors early ensures better progress and fewer bad habits.
Effective Practice Routines
A good practice routine includes daily or regular short sessions, ideally 15 to 30 minutes. Starting with basic strokes before moving to full letters helps build muscle memory.
Using guides like grid paper or templates can keep letter sizes consistent. Practicing slowly and deliberately allows better control over pressure and angles.
Tracking progress by comparing previous work shows improvement and areas needing attention. Mixing styles and experimenting with tools can keep practice engaging and build versatility.
Avoiding Common Beginner Mistakes
Beginners often press too hard or write too fast, which harms letter flow and control. It’s important to hold the pen at a steady angle and use light pressure.
Skipping foundational strokes or jumping straight to words can cause inconsistent letters. Starting with basic shapes builds a strong base.
Another common problem is neglecting posture and hand position, which leads to fatigue and shaky lines. A relaxed grip and good posture improve endurance and precision.
Frequently Asked Questions

This section covers important details about the tools needed, practice methods, and resources available to beginners. It also explains the different calligraphy styles and how to find useful materials for practice.
What basic supplies are needed to start learning calligraphy?
Beginners need a few essential supplies: a calligraphy pen or brush, ink or paint, paper, and a guide sheet. Starter kits often include these items.
High-quality paper is important to prevent bleeding and help with smooth strokes.
Can you learn calligraphy with a regular pen, or is a special tool required?
While special tools like brush pens or pointed nibs work best, beginners can start practicing with regular pens. This helps learn letter shapes and control before using specialized tools.
However, using calligraphy pens improves technique and style more effectively.
Are there free online resources for calligraphy beginners?
Many free tutorials and videos are available on YouTube and dedicated websites. These resources show stroke techniques, alphabet practice, and style examples.
Free practice sheets and step-by-step guides can also be found for download.
How can I practice the calligraphy alphabet effectively as a beginner?
Start by learning basic strokes and simple letters. Repeat each letter slowly and focus on consistency.
Using traced worksheets or following video tutorials helps improve muscle memory.
Daily short practice sessions yield better results than occasional long ones.
What are the different calligraphy writing styles I can explore?
Common styles include modern brush calligraphy, Italic, Blackletter, and Copperplate. Each style has distinct letter shapes and tools.
Beginners often start with a simple style like modern calligraphy before trying more complex scripts.
Where can I find calligraphy practice sheets to enhance my skills?
Practice sheets are available for free on many calligraphy websites and blogs. Some offer printable guides for different styles and skill levels.
They help with stroke order and consistent letter formation. Some tutorials also include practice sheets.